Craving perfectly crispy skin and juicy pork without a 12-hour smoke session? This easy herb crusted pork belly recipe does just that with very little drama.
But here’s the catch! You’ll get restaurant-level results with a few simple steps and a minimal fuss.
That’s why this recipe is my go-to when I want something impressive but not exhausting.
Contents
Equipment: Must-haves
- oven
- roasting pan
- meat thermometer
- knife
- cutting board
- mixing bowl

Equipment: Nice-to-haves
- kitchen twine
- basting brush
- microplane
- skillet
Ingredients
- 1 (about 1.5 lb) pork belly, skin-on
- 1 teaspoon salt, plus extra for finishing
- 1/2 teaspoon black pepper
- 1 clove garlic, minced
- 1 tablespoon olive oil
- 1 teaspoon Dijon mustard
- 1 tablespoon fresh rosemary, minced
- 1 tablespoon fresh thyme, minced
- 1 tablespoon fresh parsley, minced
- 1 teaspoon lemon zest
- 1/2 cup panko breadcrumb
- 1 tablespoon butter (for toasting panko)
- 1 tablespoon honey (optional glaze)
- Aluminum foil (for resting and tenting)
Instructions
- Preheat the oven to 300F so the pork can relax and render slowly while you do nothing dramatic.
- Score the skin of the pork belly with shallow diagonal cuts about half an inch apart, being careful not to cut into the meat.
- Pat the skin completely dry with a paper towel until it looks like it actually means business.
- Mix salt, pepper, and minced garlic in a mixing bowl and rub the seasoning all over the meat side of the pork belly.
- Spread Dijon mustard thinly over the meat side to act like a glue for the herb crust, and use a basting brush if you want to look fancy.
- Toast the panko in a skillet with butter until golden and fragrant, stirring so it doesn’t stage a burning protest.
- In the mixing bowl combine toasted panko, minced rosemary, thyme, parsley, lemon zest, and olive oil; stir until crumb texture is slightly moistened.
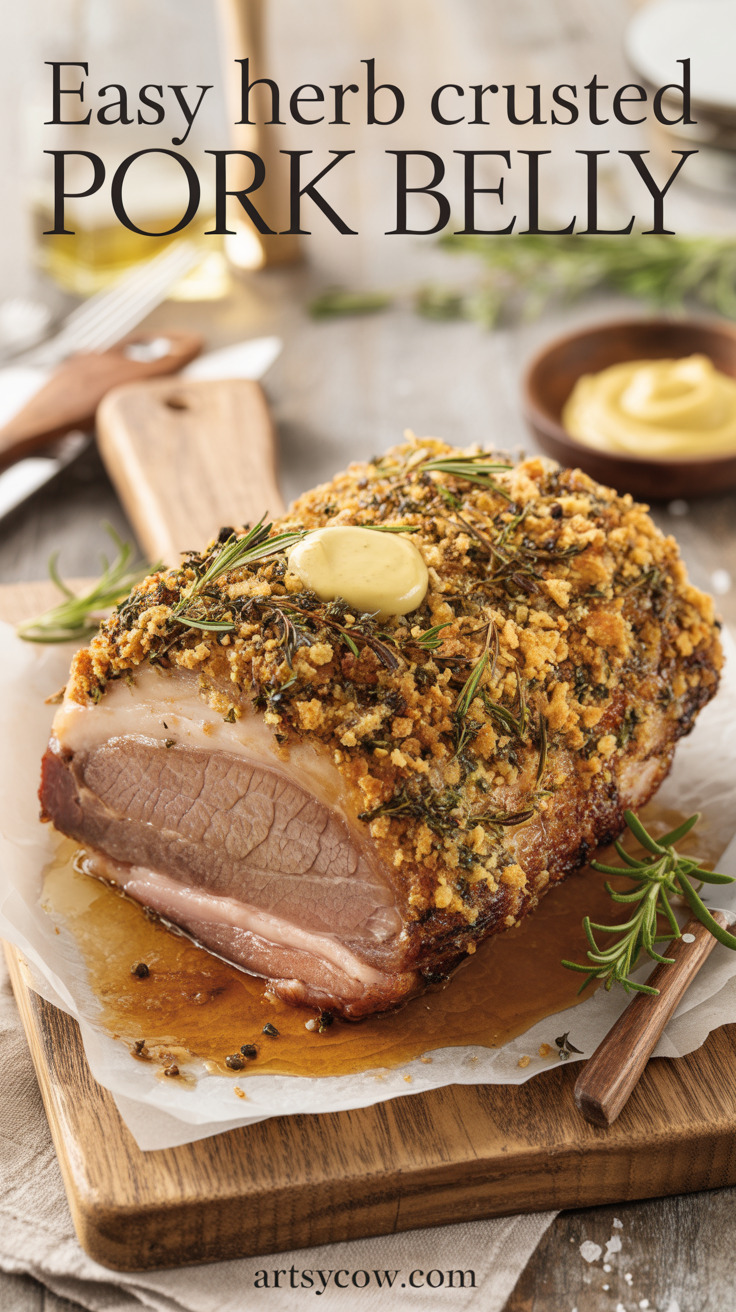
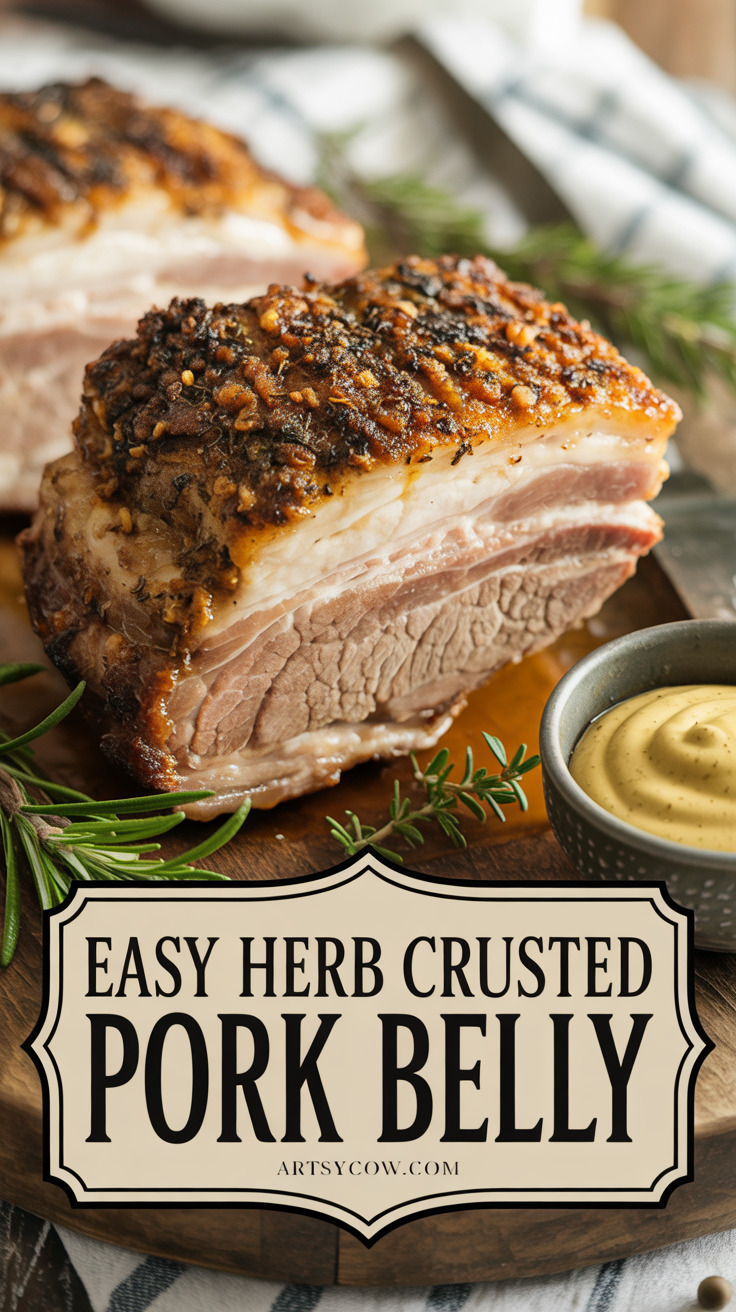
- Press the herb-panko mixture firmly onto the meat side of the pork belly so it forms a cohesive crust, but leave the skin side bare.
- If using kitchen twine, tie the pork belly loosely to keep the crust snug and the pork neat; this helps it cook evenly.
- Place a roasting rack inside the roasting pan and set the pork belly skin-side up on the rack so air can circulate and the skin can crisp.
- Roast the pork belly at the low temperature until the internal temperature reaches the point where the fat has started to render and the meat is tender.
- Increase the oven to high heat to crisp the skin and create that crackling texture; watch carefully in this stage so it doesn’t go from glorious to charred.
- If you want a shiny finish, brush the meat-side crust lightly with honey near the end of roasting and return briefly to the oven.
- Remove the pork belly from the oven when the meat thermometer registers the recommended safe internal temperature and the skin is blistered and crisp.
- Tent the pork with aluminum foil and allow it to rest so the juices redistribute and the crust sets; this is the patient part that pays off.
- Slice across the grain into serving pieces using a sharp knife, being confident and slightly smug about your crisp skin skills.

What Else You Should Know
Timing: Start this recipe when you can let the pork roast slowly. Slow heat renders fat for silky meat and dramatic skin.
Temperature notes: Roast low until the pork is tender, then blast high to crisp the skin—this two-step approach is the secret to both juicy interior and crunchy exterior.
Variations: Swap panko for crushed cornflake for extra crunch, or add smoked paprika to the herb mix for a hint of smokiness.
Try maple instead of honey for a deeper glaze—just don’t tell anyone you took a shortcut.
Serving suggestion: Serve slices with pickled vegetables or a bright salad to cut through the richness. That’s why a little acid (like lemon or vinegar) on the side is a genius move.
Make-ahead: You can roast the pork a few hours ahead, chill, then re-crisp the skin under a hot broiler for a few minutes before serving.
Pro tip: let the pork come close to room temperature before re-crisping so it heats evenly.
Safety: Always use a meat thermometer to confirm doneness. Insert it into the thickest part without touching bone or fat.
Final thought: This recipe turns a single pork belly into something people will talk about at dinner.
It’s simple, a little smug, and absolutely worth the tiny amount of effort. Now go make that crackling happen—your future self will thank you (and probably want seconds).