Welcome to the whimsical world of Frog and Worm, the best of buddies who embark on delightful adventures together! If you’re looking for a giggle-worthy drawing session with your kids, you’ve hopped to the right spot. From starry night fishing to wacky bicycle rides, these easy-to-draw ideas will not only spark creativity but also bring loads of fun. Why did the frog take the worm to the library? Because books worm their way into your hearts!
Contents
- 1 Best Friends Sitting on a Lily Pad
- 2 Fishing Together
- 3 Under the Rain
- 4 Birthday Party
- 5 Star Gazing
- 6 Riding a Bicycle
- 7 Playing Hide and Seek
- 8 Picnic Day
- 9 Balloon Flight
- 10 Library Buddies
- 11 Swing Set Fun
- 12 Building a Snowman
- 13 Cooking Together
- 14 Gardening Friends
- 15 Tea Party
- 16 Musical Duo
- 17 Scary Story Night
- 18 Boat Adventure
- 19 Kite Flying
- 20 Puzzle Solving
- 21 Fishing for Stars
- 22 Leaf Surfing
- 23 Treasure Hunt
- 24 Camping Out
- 25 Rainbow Watching
- 26 Bubble Blowing
- 27 Playing Checkers
- 28 Jump Rope
- 29 Rock Band
- 30 Science Experiment
- 31 Making a Fort
- 32 Beach Day
- 33 Stargazer
- 34 Snowball Fight
- 35 Yoga Buddies
- 36 Conclusion
- 37 Author
Best Friends Sitting on a Lily Pad

Here are the steps on how to draw a frog and worm sitting on a lily pad:
- Start by sketching the basic shapes. Draw a large oval for the lily pad, a circle for the frog’s body, and a long, skinny rectangle for the worm.
- Add details to the frog. Draw two large circles inside the frog’s body for the eyes. Then draw a smaller circle in front of each eye for the pupils. Add two short triangles for the frog’s mouth.
- Give the frog some legs. Draw two diagonal lines coming down from the bottom of the frog’s body for the front legs. Do the same thing on the other side of the frog’s body for the back legs.
- Draw the details on the lily pad. Draw a wavy line around the edge of the oval to neaten it up and make it look more like a lily pad. Add a few curved lines in the center of the lily pad for definition.
Explorer more drawing ideas:
[{"id":4412,"link":"https:\/\/artsycow.com\/frog-drawing-ideas-2\/","name":"frog-drawing-ideas-2","thumbnail":{"url":"https:\/\/artsycow.com\/wp-content\/uploads\/2024\/06\/2024-06-24-22.46.00-Cute-Easy-Frog-Drawing-ideas-frog-fi.webp","alt":"30 Adorable and Easy Frog Drawing Ideas with Fun Character Stories"},"title":"30 Adorable and Easy Frog Drawing Ideas with Fun Character Stories","postMeta":[],"author":{"name":"Nadya","link":"https:\/\/artsycow.com\/author\/nadya-sdfdf454\/"},"date":"Jun 24, 2024","dateGMT":"2024-06-24 17:48:43","modifiedDate":"2024-11-16 01:13:27","modifiedDateGMT":"2024-11-16 01:13:27","commentCount":"0","commentStatus":"open","categories":{"coma":"<a href=\"https:\/\/artsycow.com\/drawing-ideas\/frogs\/\" rel=\"category tag\">Frogs<\/a>","space":"<a href=\"https:\/\/artsycow.com\/drawing-ideas\/frogs\/\" rel=\"category tag\">Frogs<\/a>"},"taxonomies":{"post_tag":"","author":"<a href='https:\/\/artsycow.com\/author\/nadya-sdfdf454\/' rel='author'>Nadya<\/a>"},"readTime":{"min":20,"sec":45},"status":"publish","excerpt":""},{"id":4482,"link":"https:\/\/artsycow.com\/good-drawing-ideas-easy-frog\/","name":"good-drawing-ideas-easy-frog","thumbnail":{"url":"https:\/\/artsycow.com\/wp-content\/uploads\/2024\/07\/2024-07-01-20.05.59-Good-drawing-ideas-easy-frog-fi.webp","alt":"Discover 30 Adorable Bumble Bee Drawings for Kids, Each Accompanied by a Charming Short Story"},"title":"Discover 30 Amazing Easy Frog Drawing Ideas, Each Accompanied by a Charming Short Story about the Character","postMeta":[],"author":{"name":"Nadya","link":"https:\/\/artsycow.com\/author\/nadya-sdfdf454\/"},"date":"Jul 1, 2024","dateGMT":"2024-07-01 15:07:25","modifiedDate":"2025-02-02 00:57:20","modifiedDateGMT":"2025-02-02 00:57:20","commentCount":"0","commentStatus":"open","categories":{"coma":"<a href=\"https:\/\/artsycow.com\/drawing-ideas\/frogs\/\" rel=\"category tag\">Frogs<\/a>","space":"<a href=\"https:\/\/artsycow.com\/drawing-ideas\/frogs\/\" rel=\"category tag\">Frogs<\/a>"},"taxonomies":{"post_tag":"","author":"<a href='https:\/\/artsycow.com\/author\/nadya-sdfdf454\/' rel='author'>Nadya<\/a>"},"readTime":{"min":20,"sec":55},"status":"publish","excerpt":""},{"id":3572,"link":"https:\/\/artsycow.com\/frog-dinosaur-drawing-ideas\/","name":"frog-dinosaur-drawing-ideas","thumbnail":{"url":"https:\/\/artsycow.com\/wp-content\/uploads\/2024\/04\/2024-04-18-14.02.59-Frog-And-Dinosaur-drawing-ideas-fi.webp","alt":"31 Frog And Dinosaur Drawing Ideas"},"title":"31 Frog And Dinosaur Drawing Ideas","postMeta":[],"author":{"name":"Nadya","link":"https:\/\/artsycow.com\/author\/nadya-sdfdf454\/"},"date":"Apr 18, 2024","dateGMT":"2024-04-18 14:06:51","modifiedDate":"2025-02-02 01:03:46","modifiedDateGMT":"2025-02-02 01:03:46","commentCount":"0","commentStatus":"open","categories":{"coma":"<a href=\"https:\/\/artsycow.com\/drawing-ideas\/frogs\/\" rel=\"category tag\">Frogs<\/a>","space":"<a href=\"https:\/\/artsycow.com\/drawing-ideas\/frogs\/\" rel=\"category tag\">Frogs<\/a>"},"taxonomies":{"post_tag":"","author":"<a href='https:\/\/artsycow.com\/author\/nadya-sdfdf454\/' rel='author'>Nadya<\/a>"},"readTime":{"min":25,"sec":26},"status":"publish","excerpt":""},{"id":3610,"link":"https:\/\/artsycow.com\/frog-with-food-drawing-ideas\/","name":"frog-with-food-drawing-ideas","thumbnail":{"url":"https:\/\/artsycow.com\/wp-content\/uploads\/2024\/04\/2024-04-19-19.38.01-Frog-With-Food-Drawing-Ideas-fi.webp","alt":"35 Frog With Food Drawing Ideas"},"title":"35 Frog With Food Drawing Ideas","postMeta":[],"author":{"name":"Nadya","link":"https:\/\/artsycow.com\/author\/nadya-sdfdf454\/"},"date":"Apr 19, 2024","dateGMT":"2024-04-19 14:48:16","modifiedDate":"2025-02-02 01:03:46","modifiedDateGMT":"2025-02-02 01:03:46","commentCount":"0","commentStatus":"open","categories":{"coma":"<a href=\"https:\/\/artsycow.com\/drawing-ideas\/frogs\/\" rel=\"category tag\">Frogs<\/a>","space":"<a href=\"https:\/\/artsycow.com\/drawing-ideas\/frogs\/\" rel=\"category tag\">Frogs<\/a>"},"taxonomies":{"post_tag":"","author":"<a href='https:\/\/artsycow.com\/author\/nadya-sdfdf454\/' rel='author'>Nadya<\/a>"},"readTime":{"min":36,"sec":50},"status":"publish","excerpt":""}]
Fishing Together

Here are the steps on how to draw a frog and worm fishing together:
- Sketch the basic shapes first. Draw a circle for the frog’s body and a long, rectangle for the fishing rod. You can also draw a small circle at the end of the fishing line for the bobber.
- Add details to the frog. Draw two large circles inside the frog’s body for the eyes. Then draw a smaller circle in front of each eye for the pupils. Add a wide smile to the mouth.
- Give the frog some legs. Draw two diagonal lines coming down from the bottom of the frog’s body for the front legs. Frog’s feet have webbed toes, so draw three short lines coming out from the end of each diagonal line. Do the same thing on the other side of the frog’s body for the back legs.
- Draw the worm. Attach the worm to the fishing rod by drawing a small squiggly line coming off the circle at the end of the line.
Under the Rain

Here are the steps on how to draw a frog holding an umbrella over a worm sheltering from the rain:
- Start by sketching the basic shapes. Draw a circle for the frog’s body, a smaller circle above it for the frog’s head, and a long, skinny rectangle for the worm. Give the umbrella a basic dome shape with a curved handle coming down from the bottom.
- Add details to the frog. Draw two large circles inside the frog’s head for the eyes. Then draw a smaller circle in front of each eye for the pupils. Add a small smile to the mouth.
- Give the frog some arms. Draw two short lines coming out from the sides of the frog’s body just below the head. At the end of each line, draw a small circle for the frog’s hands.
- Draw the umbrella in the frog’s hands. Extend a short line straight up from the top of the umbrella dome to meet the frog’s hand. Do the same thing on the other side of the umbrella to connect it to the other frog’s hand.
- Don’t forget the rain! Draw short slanted lines falling from the top of the picture down towards the ground to represent the raindrops.
Birthday Party

Here are the steps on how to draw a frog and worm celebrating a birthday:
- Draw two circles: one large for the frog’s body and one much smaller on top for its head.
- Give the frog a party hat! On the frog’s head, draw a cone shape with a pointed tip and a straight bottom. Decorate the hat with stripes or polka dots.
- Add details to the frog’s face. Draw two large circles for the eyes and add smaller circles inside for the pupils. Draw a wide smile for the mouth.
- Don’t forget the worm! Below the frog, draw a long, skinny rectangle for the worm.
- Give the worm a birthday hat too! Draw a tiny cone shape on the worm’s head like you did for the frog. You can decorate it differently to show it’s unique.
- Draw a slice of cake! Next to the worm, draw a triangle with a curved top for the slice of cake. Add lines on top for frosting and a candle.
Star Gazing

Here’s how to draw a stargazing adventure with our frog and worm friends:
- Sketch the night sky. Fill the background of your page with blue and black swirls to represent the starry night sky. Don’t forget to add lots of little stars in various sizes throughout the sky using white dots and circles.
- Let’s add our stargazers! Draw a large, grassy hill in the center of your page. You can make the hill lumpy and uneven for a more natural look.
- Don’t forget the blanket! On the top of the hill, draw a large rectangle with rounded corners for a blanket. Add a few wavy lines on the blanket to show folds and texture.
- Time to stargaze! Draw a circle for the frog’s body on the blanket, and a smaller circle on top for its head. Give the worm a long, skinny rectangle shape next to the frog, both facing the sky.
Riding a Bicycle

Here are the steps on how to draw a frog riding a bicycle with a caterpillar in a basket:
- Start by sketching the basic shapes of the bicycle. Draw two large circles for the wheels and a rectangle in between them for the frame. Add two smaller rectangles on either side of the frame for the handlebars.
- Draw the frog. On the bicycle seat (the top part of the rectangle), draw a circle for the frog’s body and a smaller circle on top for its head.
- Give the frog some legs. Draw two diagonal lines coming down from the bottom of the frog’s body for the front legs. Do the same thing on the other side of the frog’s body for the back legs. Connect the feet to the pedals (two small circles at the bottom of the frame).
- Don’t forget the caterpillar! Draw a basket hanging from the handlebars (a small rectangle hanging from a line coming off the handlebars). Put a long, oval shape inside the basket for the caterpillar.
Playing Hide and Seek

Here are the steps on how to draw a frog hiding behind a mushroom and a worm peeking out from under a leaf:
- Start by sketching the basic shapes. Draw a large circle for the mushroom’s cap and a smaller circle for the stem. Draw a large oval for the leaf. Draw a circle for the frog’s body and a smaller circle on top for its head. Draw a long, skinny rectangle for the worm.
- Add details to the mushroom. On the cap, draw small circles or ovals to show bumps or spots. Add lines on the stem for texture.
- Position the frog behind the mushroom. Draw the frog’s circle behind the mushroom’s stem so most of its body is hidden.
- Draw the leaf. Place the oval near the bottom of the picture and curve the sides slightly to give it a leaf shape.
- Draw the worm peeking out from under the leaf. Curve the worm’s body so it’s peeking out from under the edge of the leaf.
Picnic Day

Here are the steps on how to draw a frog and worm enjoying a picnic blanket with sandwiches and juice:
- First, draw a large picnic blanket. In the center of your page, draw a wide rectangle with rounded corners for the picnic blanket. You can add lines or squiggles on the blanket to show a pattern.
- On top of the blanket, draw a round sandwich for the frog. Add a smaller circle on top of the big circle for the top piece of bread. Color the top circle light green to show lettuce.
- Next to the sandwich, draw a juice box for the worm. Draw a rectangle with a rounded top for the juice box. Add a straw sticking out of the top by drawing a short line with a small squiggle at the end.
- Draw the frog sitting next to the food. Draw a circle for the frog’s body and another circle on top for its head. Give the frog a big smile and two large eyes with black circles in the center for pupils.
- Don’t forget the worm! Draw a long, skinny rectangle for the worm next to the juice box. Curve the worm’s body so it looks like it’s reaching for the straw.
Balloon Flight

Here are the steps on how to draw a frog and worm flying in a hot air balloon based on the image you described:
- Start by drawing a large oval for the balloon. Make sure the oval is pointed at the top.
- Below the balloon, draw a basket. Draw a rectangle with a rounded bottom for the basket. Add a thin line coming out of the top center of the balloon and connect it to the basket to show the tether.
- Draw the frog peeking out of the basket. Draw a small circle on the edge of the basket for the frog’s body and another circle on top for its head. Add details like eyes and a smile.
- Draw the worm next to the frog. Draw a long, skinny rectangle next to the frog for the worm.
- Add stripes or other designs to the balloon for decoration.
Library Buddies

Here are the steps on how to draw a frog and worm reading together:
- Sketch the basic shapes first. Draw a circle for the frog’s body and another circle on top for its head. Draw a long, thin rectangle for the worm. For the book, draw a rectangle with a rounded bottom.
- Give the frog some details. Draw two large circles for the eyes and add smaller circles inside for the pupils. Add a smile to the mouth.
- Give the frog some arms. Draw two short lines coming out from the sides of the frog’s body just below the head. Curve the ends of the lines slightly and draw small circles for hands.
- Position the book in the frog’s hands. Draw the book resting on the frog’s lap with the long side facing up.
- Draw the worm peeking out from behind the book. Curve the worm’s body so it’s looking over the top of the book.
Swing Set Fun

Here are the steps on how to draw a frog and worm on a swing set:
- First, draw the swing set frame. Draw two large rectangles standing tall side-by-side. Connect the tops of the rectangles with a short horizontal bar.
- Hang the swings from the bar. Draw two short lines coming down from the bar on either side. At the ends of the lines, draw small rectangles for the seats of the swings.
- Draw the frog sitting on one swing. Draw a circle for the frog’s body in the center of one of the swing seats. Add another circle on top for the head. Draw legs coming down from the bottom of the body and connect them to the swing seat with short lines.
- Draw the worm on the other swing. Draw a long, skinny rectangle in the center of the other swing seat for the worm.
Building a Snowman

Let’s keep rolling and draw a frog and worm building a snowman! Here’s how to capture this winter scene:
- Start with the snowman’s body. Draw two large circles, one on top of the other, for the snowman’s body. The bottom circle should be the biggest. Leave space between the circles for our worm friend.
- Don’t forget the head! Add a smaller circle on top of the large circles for the snowman’s head.
- Time for a hat! Draw a triangle on top of the snowman’s head for a hat. You can add a rectangle sticking out from the bottom of the triangle for the hat brim.
- Here comes the muscle! On the right side of the snowman, draw a large circle for the snowball the frog is pushing. Add a smaller circle connected to the big circle on the bottom left side for the frog’s body. Top it off with another circle for the frog’s head. Draw two short legs coming out from the bottom of the big circle to show the frog is pushing.
- Worm on top! Draw a long, skinny rectangle on top of the snowman’s head for the worm.
Cooking Together

Let’s whip up a fun drawing of a frog and worm cooking together. Here’s how to get started:
- Sketch the ingredients. Draw a large pot in the center of your page. On the left side, add a circle for a bowl.
- It’s time for our chefs! Draw a circle for the frog’s body to the right of the pot, and a smaller circle on top for its head. Give the worm a long, skinny rectangle shape below the frog.
- Let’s get cooking! Draw a spoon in the frog’s hand (two short lines coming out from the body with a circle at the end) stirring the pot.
- Don’t forget the recipe! Draw a book next to the bowl for the recipe.
Gardening Friends

Let’s draw our frog and worm friends tending to their garden. Here’s how to sketch this scene:
- Start with the garden plot. Draw a long rectangle for the garden bed. You can add a fence around it with short lines at the top and bottom.
- Plant power! Draw a few different-sized circles and ovals inside the garden bed to show the plants.
- Let’s add our gardeners! Draw a circle for the frog’s body in the center of the garden, and a smaller circle on top for its head. Give the worm a long, skinny rectangle shape to the left of the frog.
- Time to water! Draw a watering can in the frog’s hand (two short lines coming out from the body with a triangle on the end) with water flowing out in curved lines towards the plants.
Tea Party

Here’s how to create this charming scene:
- Sketch the table setting. Draw a large circle in the center of your page for the tablecloth. On top of the circle, draw a small cup and saucer for the frog and a tiny teacup (almost like a shotglass) for the worm.
- Let’s add our guests! Draw a circle for the frog’s body to the left of the tea set, and a smaller circle on top for its head. Give the worm a long, skinny rectangle shape to the right of the tea set.
- Tea time! Draw a straw sticking out of the worm’s teacup (a short line with a small squiggle at the end).
- Don’t forget the treats! Add a cupcake or a slice of pie next to each teacup for a yummy snack.
Musical Duo

Let’s create a harmonious musical duo with a frog and a worm:
- Start with the musicians. Draw a circle for the frog’s body in the center of your page and a smaller circle on top for its head. Draw a long, thin rectangle below the frog for the worm.
- Instrument time! On the frog’s lap, draw a tall rectangle with a rounded bottom for a microphone. To the right of the frog, draw a smaller rectangle with a slanted top for the worm’s trumpet.
- Let’s make music! Draw two short lines coming out from the frog’s mouth with circles at the ends for its hands. Position one hand holding the microphone close to its mouth. For the worm, draw a short line coming out from its mouth with a circle at the end for its arm holding the trumpet up to play.
Scary Story Night

Here are the steps on how to draw a frog reading a scary story to a worm:
- Sketch the setting. Draw a large rectangle in the center of your page for the blanket. You can add wavy lines on the blanket to show folds and texture.
- Don’t forget the book! In the center of the blanket, draw a rectangle with a rounded bottom for the storybook.
- Let’s add our characters! Draw a circle for the frog’s body to the left of the book, and a smaller circle on top for its head. Give the worm a long, skinny rectangle shape curled up under the blanket next to the book.
- Storytime! Draw the frog holding the book open with two short lines coming out from its body and circles at the ends for hands. Tilt the book so it’s facing the worm.
- Add spooky details! Draw a few pointy shapes coming out from the top of the blanket by the book to show shadows or scary figures from the story.
Explorer more drawing ideas:
[{"id":4412,"link":"https:\/\/artsycow.com\/frog-drawing-ideas-2\/","name":"frog-drawing-ideas-2","thumbnail":{"url":"https:\/\/artsycow.com\/wp-content\/uploads\/2024\/06\/2024-06-24-22.46.00-Cute-Easy-Frog-Drawing-ideas-frog-fi.webp","alt":"30 Adorable and Easy Frog Drawing Ideas with Fun Character Stories"},"title":"30 Adorable and Easy Frog Drawing Ideas with Fun Character Stories","postMeta":[],"author":{"name":"Nadya","link":"https:\/\/artsycow.com\/author\/nadya-sdfdf454\/"},"date":"Jun 24, 2024","dateGMT":"2024-06-24 17:48:43","modifiedDate":"2024-11-16 01:13:27","modifiedDateGMT":"2024-11-16 01:13:27","commentCount":"0","commentStatus":"open","categories":{"coma":"<a href=\"https:\/\/artsycow.com\/drawing-ideas\/frogs\/\" rel=\"category tag\">Frogs<\/a>","space":"<a href=\"https:\/\/artsycow.com\/drawing-ideas\/frogs\/\" rel=\"category tag\">Frogs<\/a>"},"taxonomies":{"post_tag":"","author":"<a href='https:\/\/artsycow.com\/author\/nadya-sdfdf454\/' rel='author'>Nadya<\/a>"},"readTime":{"min":20,"sec":45},"status":"publish","excerpt":""},{"id":4482,"link":"https:\/\/artsycow.com\/good-drawing-ideas-easy-frog\/","name":"good-drawing-ideas-easy-frog","thumbnail":{"url":"https:\/\/artsycow.com\/wp-content\/uploads\/2024\/07\/2024-07-01-20.05.59-Good-drawing-ideas-easy-frog-fi.webp","alt":"Discover 30 Adorable Bumble Bee Drawings for Kids, Each Accompanied by a Charming Short Story"},"title":"Discover 30 Amazing Easy Frog Drawing Ideas, Each Accompanied by a Charming Short Story about the Character","postMeta":[],"author":{"name":"Nadya","link":"https:\/\/artsycow.com\/author\/nadya-sdfdf454\/"},"date":"Jul 1, 2024","dateGMT":"2024-07-01 15:07:25","modifiedDate":"2025-02-02 00:57:20","modifiedDateGMT":"2025-02-02 00:57:20","commentCount":"0","commentStatus":"open","categories":{"coma":"<a href=\"https:\/\/artsycow.com\/drawing-ideas\/frogs\/\" rel=\"category tag\">Frogs<\/a>","space":"<a href=\"https:\/\/artsycow.com\/drawing-ideas\/frogs\/\" rel=\"category tag\">Frogs<\/a>"},"taxonomies":{"post_tag":"","author":"<a href='https:\/\/artsycow.com\/author\/nadya-sdfdf454\/' rel='author'>Nadya<\/a>"},"readTime":{"min":20,"sec":55},"status":"publish","excerpt":""},{"id":3572,"link":"https:\/\/artsycow.com\/frog-dinosaur-drawing-ideas\/","name":"frog-dinosaur-drawing-ideas","thumbnail":{"url":"https:\/\/artsycow.com\/wp-content\/uploads\/2024\/04\/2024-04-18-14.02.59-Frog-And-Dinosaur-drawing-ideas-fi.webp","alt":"31 Frog And Dinosaur Drawing Ideas"},"title":"31 Frog And Dinosaur Drawing Ideas","postMeta":[],"author":{"name":"Nadya","link":"https:\/\/artsycow.com\/author\/nadya-sdfdf454\/"},"date":"Apr 18, 2024","dateGMT":"2024-04-18 14:06:51","modifiedDate":"2025-02-02 01:03:46","modifiedDateGMT":"2025-02-02 01:03:46","commentCount":"0","commentStatus":"open","categories":{"coma":"<a href=\"https:\/\/artsycow.com\/drawing-ideas\/frogs\/\" rel=\"category tag\">Frogs<\/a>","space":"<a href=\"https:\/\/artsycow.com\/drawing-ideas\/frogs\/\" rel=\"category tag\">Frogs<\/a>"},"taxonomies":{"post_tag":"","author":"<a href='https:\/\/artsycow.com\/author\/nadya-sdfdf454\/' rel='author'>Nadya<\/a>"},"readTime":{"min":25,"sec":26},"status":"publish","excerpt":""},{"id":3610,"link":"https:\/\/artsycow.com\/frog-with-food-drawing-ideas\/","name":"frog-with-food-drawing-ideas","thumbnail":{"url":"https:\/\/artsycow.com\/wp-content\/uploads\/2024\/04\/2024-04-19-19.38.01-Frog-With-Food-Drawing-Ideas-fi.webp","alt":"35 Frog With Food Drawing Ideas"},"title":"35 Frog With Food Drawing Ideas","postMeta":[],"author":{"name":"Nadya","link":"https:\/\/artsycow.com\/author\/nadya-sdfdf454\/"},"date":"Apr 19, 2024","dateGMT":"2024-04-19 14:48:16","modifiedDate":"2025-02-02 01:03:46","modifiedDateGMT":"2025-02-02 01:03:46","commentCount":"0","commentStatus":"open","categories":{"coma":"<a href=\"https:\/\/artsycow.com\/drawing-ideas\/frogs\/\" rel=\"category tag\">Frogs<\/a>","space":"<a href=\"https:\/\/artsycow.com\/drawing-ideas\/frogs\/\" rel=\"category tag\">Frogs<\/a>"},"taxonomies":{"post_tag":"","author":"<a href='https:\/\/artsycow.com\/author\/nadya-sdfdf454\/' rel='author'>Nadya<\/a>"},"readTime":{"min":36,"sec":50},"status":"publish","excerpt":""}]
Boat Adventure

Let’s set sail on a boat adventure with our frog and worm friends. Here’s how to draw this scene:
- Draw the boat. In the center of your page, draw a long rectangle with a rounded bottom for the boat hull. Add a slanted line at the front of the rectangle for the boat’s bow cutting through the water.
- Don’t forget the sail! Draw a tall triangle in the back of the boat for the sail. You can add horizontal lines across the triangle for stripes or decoration.
- Let’s add our characters! Draw a small circle on top of the front part of the boat for the frog’s head and a circle below it for its body. Draw a long, skinny rectangle next to the frog for the worm.
- Time to explore! Draw the frog holding a telescope (a long thin rectangle with a circle at one end) with two short lines coming out from its body. The worm can be waving a tiny flag (a short line with a rectangle at the end) in the breeze.
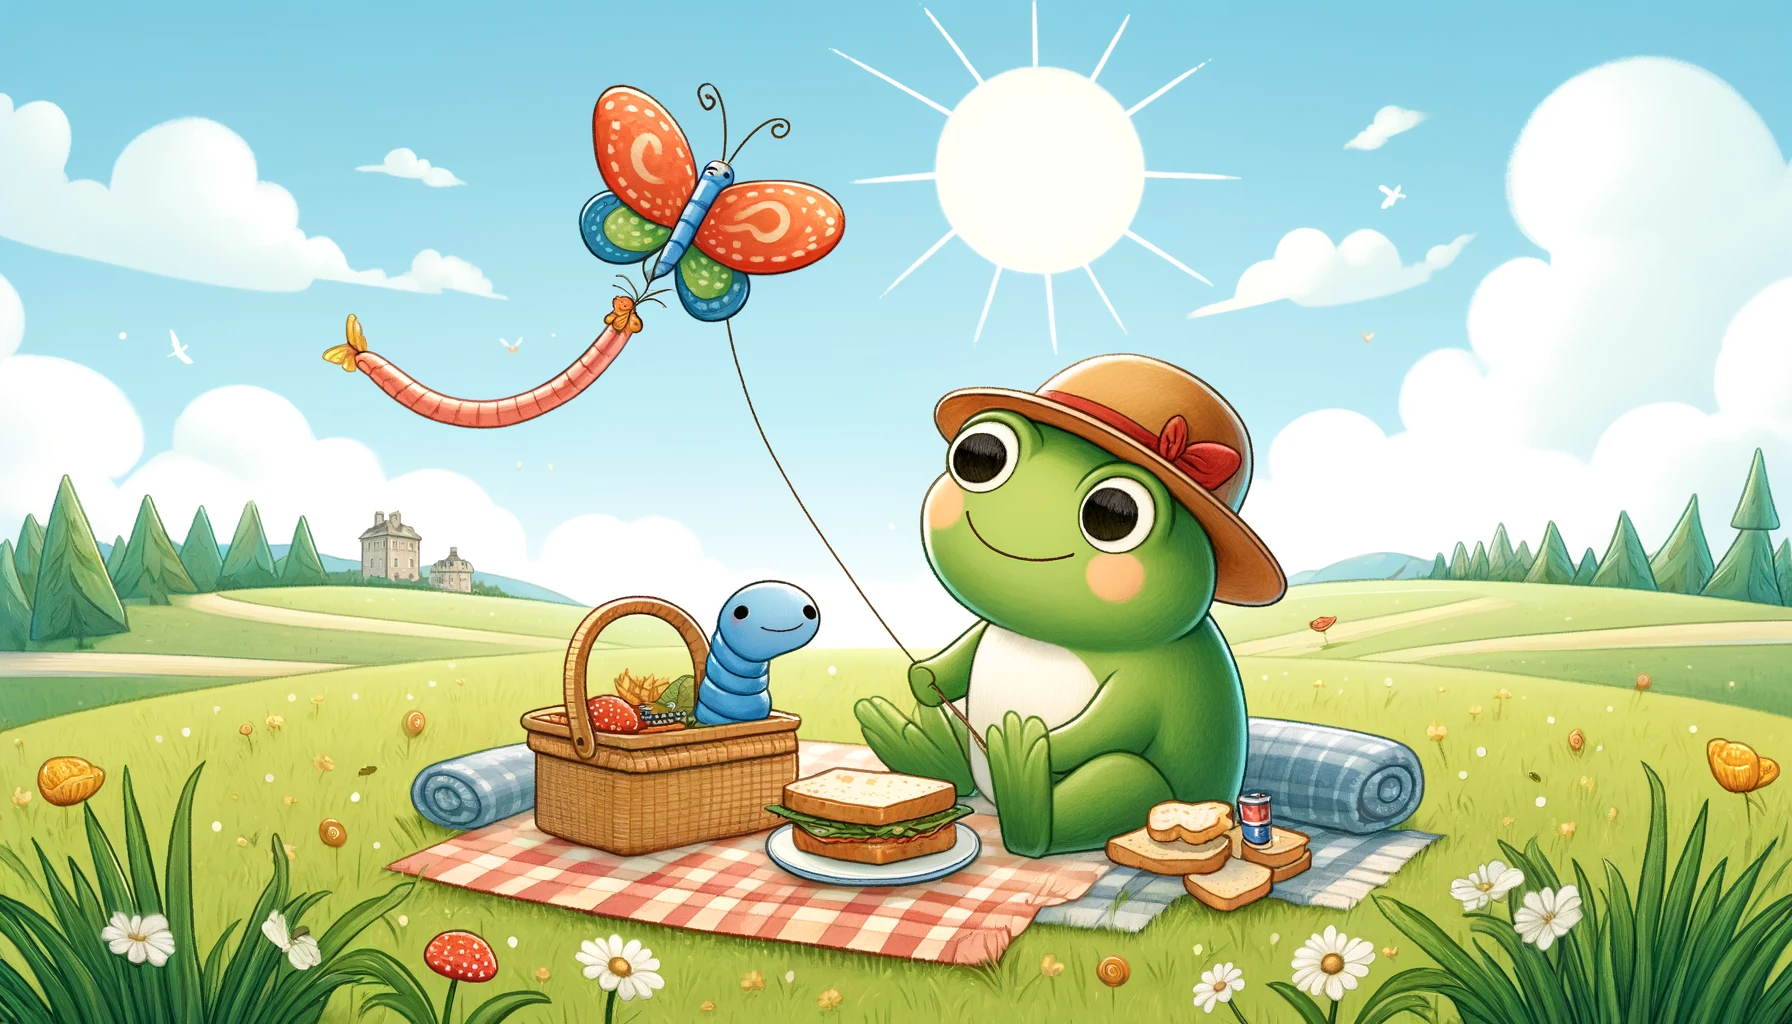
Kite Flying

Here’s how to capture this scene:
- Start with the kite. Draw a large diamond shape in the center of the page for the kite. You can add a long, thin tail trailing from the bottom corner of the diamond.
- Don’t forget the string! Draw a thin line coming down from the top corner of the kite to the bottom of the page. This is the string the frog will be holding.
- Let’s add our characters! Draw a circle for the frog’s body towards the bottom of the page, and a smaller circle on top for its head. Give the worm a long, skinny rectangle shape below the frog, holding onto the string.
- Time to fly! Draw two short lines coming out from the frog’s body with circles at the ends for hands. Make sure one hand is holding the string from the kite.
Puzzle Solving

Let’s put our frog and worm friends to the test with a tricky puzzle:
- Sketch the puzzle. Draw a large square in the center of your page. Divide the square into smaller squares with horizontal and vertical lines to make a puzzle grid. You can leave some squares blank to show completed parts.
- Let’s add our puzzlers! Draw a circle for the frog’s body to the left of the puzzle, and a smaller circle on top for its head. Give the worm a long, skinny rectangle shape to the right of the puzzle.
- Thinking hard! Draw the frog holding a magnifying glass (a circle with a line coming out from the bottom) with two short lines coming out from its body. Tilt the magnifying glass towards the puzzle.
- Worm’s helping hand! Draw the worm reaching out towards the puzzle with a short line coming out from its body and a circle at the end.
Fishing for Stars

Here’s how to capture this starry scene:
- Draw the night sky. Fill the background of your page with blue and black swirls to represent the night sky.
- Don’t forget the stars! Add lots of little stars in various sizes throughout the sky using white dots and circles.
- Let’s add our characters! Draw a small crescent moon in the middle of the page. On the moon, draw a circle for the frog’s body and a smaller circle on top for its head. Give the worm a long, skinny rectangle shape next to the frog.
- Time to fish! Draw a short line coming out from the frog’s mouth with a circle at the end for its hand. Attach a long, wavy line to the circle, like a fishing line. Add a star (a five-pointed shape) to the end of the line.
Leaf Surfing

Let’s get our frog and worm friends riding the waves on a leaf:
- Draw a large leaf in the center of your page. Make the leaf oval-shaped with a pointed tip at one end. Add lines curving down the sides from the pointed tip to the wide end to show veins.
- Don’t forget the water! Draw small wavy lines around the bottom of the leaf to represent water.
- Let’s add our characters! Draw a circle for the frog’s body on top of the leaf towards the wide end, and a smaller circle on top for its head. Give the worm a long, skinny rectangle shape next to the frog, also on the leaf.
- Time to catch a wave! Draw the frog paddling with two short lines coming out from the sides of its body with circles at the ends for hands.
Treasure Hunt

Here’s how to map out this exciting scene:
- Draw the landscape. Sketch a rolling hill in the center of your page. You can add a few wavy lines on top to show grass.
- Don’t forget the treasure! At the base of the hill, draw a small chest with a rounded top and a rectangle for the base. Add an X on the front to mark the spot.
- Let’s add our adventurers! Draw a circle for the frog’s body to the left of the treasure chest, and a smaller circle on top for its head. Give the worm a long, skinny rectangle shape to the right of the treasure chest.
- Digging for riches! Draw the frog holding a shovel (a long rectangle with a slanted line at one end) with two short lines coming out from its body. The frog can be tilted forward as if digging.
Camping Out

Let’s pitch a tent and cozy up under the stars with our frog and worm friends:
- Start with the tent. Draw a large triangle in the center of your page for the tent body. Add two short lines slanting down from the top of the triangle to the bottom to create the tent’s base.
- Don’t forget the campfire! In front of the tent, draw a circle for the campfire. Add orange and red squiggly lines inside the circle to represent fire.
- Let’s add our campers! Draw a small circle on top of the tent for the frog’s head and a circle below it for its body peeking out from the tent. Draw a long, skinny rectangle next to the campfire for the worm.
- Time to roast marshmallows! Draw a short stick (a long, thin rectangle) in the frog’s hand with a circle at the end. On top of the circle, draw a small oval for a marshmallow.
Rainbow Watching

Here’s how to capture this colorful scene:
- Draw a big rainbow arcing across the top of the page. Use curved lines in red, orange, yellow, green, blue, indigo, and violet to create a colorful arc.
- Don’t forget the ground! Draw a long, wavy line across the bottom third of the page to represent the ground.
- Let’s add our observers! Draw a small circle in the center of the page, below the rainbow, for the frog’s body. Add another circle on top for its head. Give the worm a long, skinny rectangle shape to the left of the frog.
- Looking up in wonder! Draw the frog with two big eyes looking up at the rainbow. You can add a wide smile for a touch of awe. The worm can tilt its head up slightly with a surprised expression.
Bubble Blowing

Let’s create a bubbly scene with our frog and worm friends:
- Start with the bubbles! Draw a few circles of various sizes floating near the top of the page. Make sure the circles are light and don’t use too much pressure with your pencil.
- Don’t forget the blower! In the lower part of the page, draw a circle for the frog’s body and a smaller circle on top for its head. Add a short line coming out from the frog’s mouth with a circle at the end for its hand. This hand will be holding the bubble wand.
- Let’s add our bubble maker! The bubble wand can be drawn with another short line coming out from the frog’s hand, with a long, thin rectangle at the end.
- Worm friend enjoying the bubbles! Draw a long, skinny rectangle shape for the worm to the right of the frog, looking up at the bubbles with a big smile.
Playing Checkers

Let’s get our frog and worm friends settled in for a friendly game of checkers. Here’s how to draw this scene:
- Draw the checkerboard. In the center of your page, draw a large square and divide it into a grid of 8×8 squares with horizontal and vertical lines. Color half the squares black or dark green to create a checkerboard pattern.
- Don’t forget the game pieces! Scatter a few checker pieces around the board. You can draw circles for the frog’s pieces and tiny squares for the worm’s pieces.
- Let’s add our players! Draw a circle for the frog’s body on the left side of the checkerboard, and a smaller circle on top for its head. Give the worm a long, skinny rectangle shape on the right side of the board.
- Thinking about the next move! Draw the frog resting its chin on one hand (two short lines coming out from the body with a circle at the end) while looking intently at the board.
Jump Rope

Here’s how to capture this energetic moment:
- Start with the jump rope. Draw a long, thin rectangle across the middle of the page with wavy lines on either end. This represents the jump rope in motion.
- Don’t forget the frog! In the center of the jump rope, draw a circle for the frog’s body and a smaller circle on top for its head. Add two short lines coming out from the sides of the body with circles at the ends for hands. The frog’s hands should be holding the jump rope.
- Let’s add the worm! Draw a long, skinny rectangle below the frog, holding onto the jump rope with one end. The worm can look excited with a big smile.
- Jumping high! Draw the frog’s legs stretched out in mid-air to show it’s jumping.
Rock Band

Let’s rock out with a funky frog and worm band. Here’s how to capture this musical scene:
- Sketch the stage. Draw a large rectangle in the center of your page for the stage. You can add horizontal lines across the rectangle to show floorboards.
- Don’t forget the instruments! On the left side of the stage, draw a tall rectangle with a rounded bottom for a microphone. On the right side, draw a smaller rectangle with a slanted top for the worm’s trumpet.
- Let’s add our rock stars! Draw a circle for the frog’s body in the center of the stage and a smaller circle on top for its head. Give the worm a long, skinny rectangle shape to the right of the microphone, holding onto it with one end.
- Time to make music! Draw the frog with two short lines coming out from its body and circles at the ends for hands. One hand can be holding a guitar (draw a long rectangle with a curved body and a smaller rectangle at the top for the neck). The other hand can be raised in the air, rocking out! The worm can be playing the trumpet with a short line coming out from its mouth with a circle at the end for its arm.
Science Experiment

Here’s how to draw a scientific experiment scene with a frog and worm:
- Start with the lab table. Draw a long rectangle in the center of your page for the table. Add two short legs at each end of the rectangle to make it look like a table.
- Don’t forget the beakers! In the center of the table, draw two beakers. Beakers look like round containers with a spout on one side. You can add bubbles or liquid inside the beakers.
- Let’s add our scientists! Draw a circle for the frog’s body on the left side of the table, and a smaller circle on top for its head. Give the worm a long, skinny rectangle shape on the right side of the table, wearing safety goggles (two large circles connected by a thin line resting on the worm’s head).
- Experiment time! The frog can be holding a test tube (a long, thin tube with a round bottom) with one hand (two short lines coming out from the body with a circle at the end). The worm can be reaching towards the other beaker with its other end.
Making a Fort

Let’s build a cozy fort together with our frog and worm friends:
- Sketch the fort frame. Draw a triangle in the center of your page for the front of the fort. Add a long rectangle at the base of the triangle to show the floor. You can add another triangle leaning back on the first one to create a roof.
- Don’t forget the entrance! Draw a rectangle with a rounded top on the front of the fort for the doorway.
- Let’s add our builders! Draw a circle for the frog’s body to the left of the doorway, and a smaller circle on top for its head. Give the worm a long, skinny rectangle shape to the right of the doorway.
- Decorate the fort! You can draw blankets or pillows peeking out from the doorway or on top of the roof to show it’s cozy inside.
Beach Day

Let’s draw a relaxing beach day scene with our frog and worm friends:
- Sketch the beach umbrella. Draw a large circle in the center of your page for the umbrella’s canopy. Add a long, thin line coming down from the center of the circle for the pole. Draw a few curved lines radiating out from the top of the pole to connect to the edges of the circle, like spokes on a wheel.
- Don’t forget the beach towel! Underneath the umbrella, draw a large rectangle for the beach towel. You can add lines or stripes on the towel for decoration.
- Let’s add our beach buddies! Draw a circle for the frog’s body resting under the beach umbrella, and a smaller circle on top for its head. Give the worm a long, skinny rectangle shape next to the frog, relaxing on the beach towel.
- Beach time fun! The frog can be wearing sunglasses (two small circles with ovals on top) and holding a tall, cold drink (a rectangle with a rounded top and a straw sticking out from it). The worm can be building a sandcastle next to them with a small shovel (a short line with a slanted rectangle at the end).
Stargazer

Here’s how to draw a stargazing scene with a frog and worm:
- Sketch a grassy hill. Draw a large, rounded bump in the center of your page to form a grassy hill. You can add a few wavy lines on the side to show blades of grass.
- Don’t forget the blanket! On the top of the hill, draw a large rectangle with rounded corners for a blanket. Add a few wavy lines on the blanket to show folds and texture.
- Let’s add our stargazers! Draw a circle for the frog’s body on the blanket, and a smaller circle on top for its head. Give the worm a long, skinny rectangle shape next to the frog, both facing the night sky.
- Time to stargaze! Tilt the frog’s head back slightly as if looking up at the sky. Draw two large circles for the frog’s eyes gazing upwards. The worm can have big, curious eyes looking up at the stars as well.
Snowball Fight

Here’s how to capture a playful snowball fight between our frog and worm friends:
- Start with the frog. Draw a circle for the frog’s body in the lower part of the page. Add a smaller circle on top for its head.
- Don’t forget the worm! Draw a long, skinny rectangle shape above the frog for the worm.
- Time to throw! Draw the frog with one arm raised high (a short line coming out from the body with a circle at the end) holding a large snowball (a circle). The other arm can be drawn behind its back, ready to throw another snowball.
- Worm dodging! Draw the worm bent in a curve with one end raised high in the air, as if dodging a snowball.
Explorer more drawing ideas:
[{"id":4412,"link":"https:\/\/artsycow.com\/frog-drawing-ideas-2\/","name":"frog-drawing-ideas-2","thumbnail":{"url":"https:\/\/artsycow.com\/wp-content\/uploads\/2024\/06\/2024-06-24-22.46.00-Cute-Easy-Frog-Drawing-ideas-frog-fi.webp","alt":"30 Adorable and Easy Frog Drawing Ideas with Fun Character Stories"},"title":"30 Adorable and Easy Frog Drawing Ideas with Fun Character Stories","postMeta":[],"author":{"name":"Nadya","link":"https:\/\/artsycow.com\/author\/nadya-sdfdf454\/"},"date":"Jun 24, 2024","dateGMT":"2024-06-24 17:48:43","modifiedDate":"2024-11-16 01:13:27","modifiedDateGMT":"2024-11-16 01:13:27","commentCount":"0","commentStatus":"open","categories":{"coma":"<a href=\"https:\/\/artsycow.com\/drawing-ideas\/frogs\/\" rel=\"category tag\">Frogs<\/a>","space":"<a href=\"https:\/\/artsycow.com\/drawing-ideas\/frogs\/\" rel=\"category tag\">Frogs<\/a>"},"taxonomies":{"post_tag":"","author":"<a href='https:\/\/artsycow.com\/author\/nadya-sdfdf454\/' rel='author'>Nadya<\/a>"},"readTime":{"min":20,"sec":45},"status":"publish","excerpt":""},{"id":4482,"link":"https:\/\/artsycow.com\/good-drawing-ideas-easy-frog\/","name":"good-drawing-ideas-easy-frog","thumbnail":{"url":"https:\/\/artsycow.com\/wp-content\/uploads\/2024\/07\/2024-07-01-20.05.59-Good-drawing-ideas-easy-frog-fi.webp","alt":"Discover 30 Adorable Bumble Bee Drawings for Kids, Each Accompanied by a Charming Short Story"},"title":"Discover 30 Amazing Easy Frog Drawing Ideas, Each Accompanied by a Charming Short Story about the Character","postMeta":[],"author":{"name":"Nadya","link":"https:\/\/artsycow.com\/author\/nadya-sdfdf454\/"},"date":"Jul 1, 2024","dateGMT":"2024-07-01 15:07:25","modifiedDate":"2025-02-02 00:57:20","modifiedDateGMT":"2025-02-02 00:57:20","commentCount":"0","commentStatus":"open","categories":{"coma":"<a href=\"https:\/\/artsycow.com\/drawing-ideas\/frogs\/\" rel=\"category tag\">Frogs<\/a>","space":"<a href=\"https:\/\/artsycow.com\/drawing-ideas\/frogs\/\" rel=\"category tag\">Frogs<\/a>"},"taxonomies":{"post_tag":"","author":"<a href='https:\/\/artsycow.com\/author\/nadya-sdfdf454\/' rel='author'>Nadya<\/a>"},"readTime":{"min":20,"sec":55},"status":"publish","excerpt":""},{"id":3572,"link":"https:\/\/artsycow.com\/frog-dinosaur-drawing-ideas\/","name":"frog-dinosaur-drawing-ideas","thumbnail":{"url":"https:\/\/artsycow.com\/wp-content\/uploads\/2024\/04\/2024-04-18-14.02.59-Frog-And-Dinosaur-drawing-ideas-fi.webp","alt":"31 Frog And Dinosaur Drawing Ideas"},"title":"31 Frog And Dinosaur Drawing Ideas","postMeta":[],"author":{"name":"Nadya","link":"https:\/\/artsycow.com\/author\/nadya-sdfdf454\/"},"date":"Apr 18, 2024","dateGMT":"2024-04-18 14:06:51","modifiedDate":"2025-02-02 01:03:46","modifiedDateGMT":"2025-02-02 01:03:46","commentCount":"0","commentStatus":"open","categories":{"coma":"<a href=\"https:\/\/artsycow.com\/drawing-ideas\/frogs\/\" rel=\"category tag\">Frogs<\/a>","space":"<a href=\"https:\/\/artsycow.com\/drawing-ideas\/frogs\/\" rel=\"category tag\">Frogs<\/a>"},"taxonomies":{"post_tag":"","author":"<a href='https:\/\/artsycow.com\/author\/nadya-sdfdf454\/' rel='author'>Nadya<\/a>"},"readTime":{"min":25,"sec":26},"status":"publish","excerpt":""},{"id":3610,"link":"https:\/\/artsycow.com\/frog-with-food-drawing-ideas\/","name":"frog-with-food-drawing-ideas","thumbnail":{"url":"https:\/\/artsycow.com\/wp-content\/uploads\/2024\/04\/2024-04-19-19.38.01-Frog-With-Food-Drawing-Ideas-fi.webp","alt":"35 Frog With Food Drawing Ideas"},"title":"35 Frog With Food Drawing Ideas","postMeta":[],"author":{"name":"Nadya","link":"https:\/\/artsycow.com\/author\/nadya-sdfdf454\/"},"date":"Apr 19, 2024","dateGMT":"2024-04-19 14:48:16","modifiedDate":"2025-02-02 01:03:46","modifiedDateGMT":"2025-02-02 01:03:46","commentCount":"0","commentStatus":"open","categories":{"coma":"<a href=\"https:\/\/artsycow.com\/drawing-ideas\/frogs\/\" rel=\"category tag\">Frogs<\/a>","space":"<a href=\"https:\/\/artsycow.com\/drawing-ideas\/frogs\/\" rel=\"category tag\">Frogs<\/a>"},"taxonomies":{"post_tag":"","author":"<a href='https:\/\/artsycow.com\/author\/nadya-sdfdf454\/' rel='author'>Nadya<\/a>"},"readTime":{"min":36,"sec":50},"status":"publish","excerpt":""}]
Yoga Buddies

Here’s how to draw our frog and worm friends practicing yoga together:
- Sketch the frog. Draw a large circle in the center of your page for the frog’s body. On top of the circle, draw a smaller circle for the head.
- Don’t forget the worm! Below the frog, draw a long, skinny rectangle for the worm’s body.
- Let’s strike a pose! Draw the frog in a downward-facing dog pose. For this pose, draw the frog’s legs and arms stretched out straight back, with the heels reaching towards the ground and the arms shoulder-width apart. The worm can be curled up underneath the frog in a resting position.
- Time to om! Draw the frog with its eyes closed and a peaceful smile, indicating a state of relaxation.
Conclusion
We hope you enjoyed diving into the playful universe of Frog and Worm as much as they enjoyed their muddy pies and bubble escapades! Keep the creativity leaping and the pencils hopping with these drawing ideas that are perfect for young artists. Remember, every masterpiece starts with a giggle, so why did the worm ride on the frog’s back? Because he didn’t want to miss the hop-portunity for adventure! Draw, laugh, and bond over these cute scenarios that are sure to bring smiles and squiggles alike. Happy drawing!