Refillable markers offer an eco-conscious choice for artists who care about sustainability without sacrificing the joy of colorful expression.
If you like me and adore creating vibrant drawings yet feel torn about the environmental impact of disposable markers, refillable options can be a game-changer.
While recycling traditional markers can be a hassle, refillable markers sidestep this issue almost entirely.
Not only do they reduce waste, but they also open up opportunities for personalized ink choices and the ability to maintain your markers for longer use.
You have the power to replenish your marker’s ink supply whenever needed, ensuring that your favorite shades are always ready at hand.
Let’s learn more about these tools!
Contents
- 1 Key Takeaways
- 2 Choosing Your Refillable Markers
- 3 How Transparent Refillable Markers Are Constructed
- 4 Ink/Paint Selection
- 5 Step-by-Step Refilling Process
- 6 Cleaning And Maintaining Your Refillable Markers
- 7 Can You Change The Paint In The Marker After Filling It?
- 8 Troubleshooting Common Problems
- 9 Conclusion
- 10 Author
Key Takeaways
- Refillable markers are sustainable and customizable.
- They offer continuous use with easy refilling and maintenance.
- Proper care extends the lifespan of your markers.
Choosing Your Refillable Markers
When I started my journey with refillable markers, I opted for markers with a transparent plastic design. This allows me to see the remaining ink or paint levels easily as well as the actual color of the medium.
These refillable markers that come empty give you the freedom to experiment with various liquid mediums. Whether you want to work with different types of inks or a variety of paint, these markers can adapt to your creative needs.
Before buying, I recommend to check that the marker works well with your chosen ink or paint to avoid clogging or poor flow.
Remember, the right marker can add both efficiency and enjoyment to your art practice.
How Transparent Refillable Markers Are Constructed

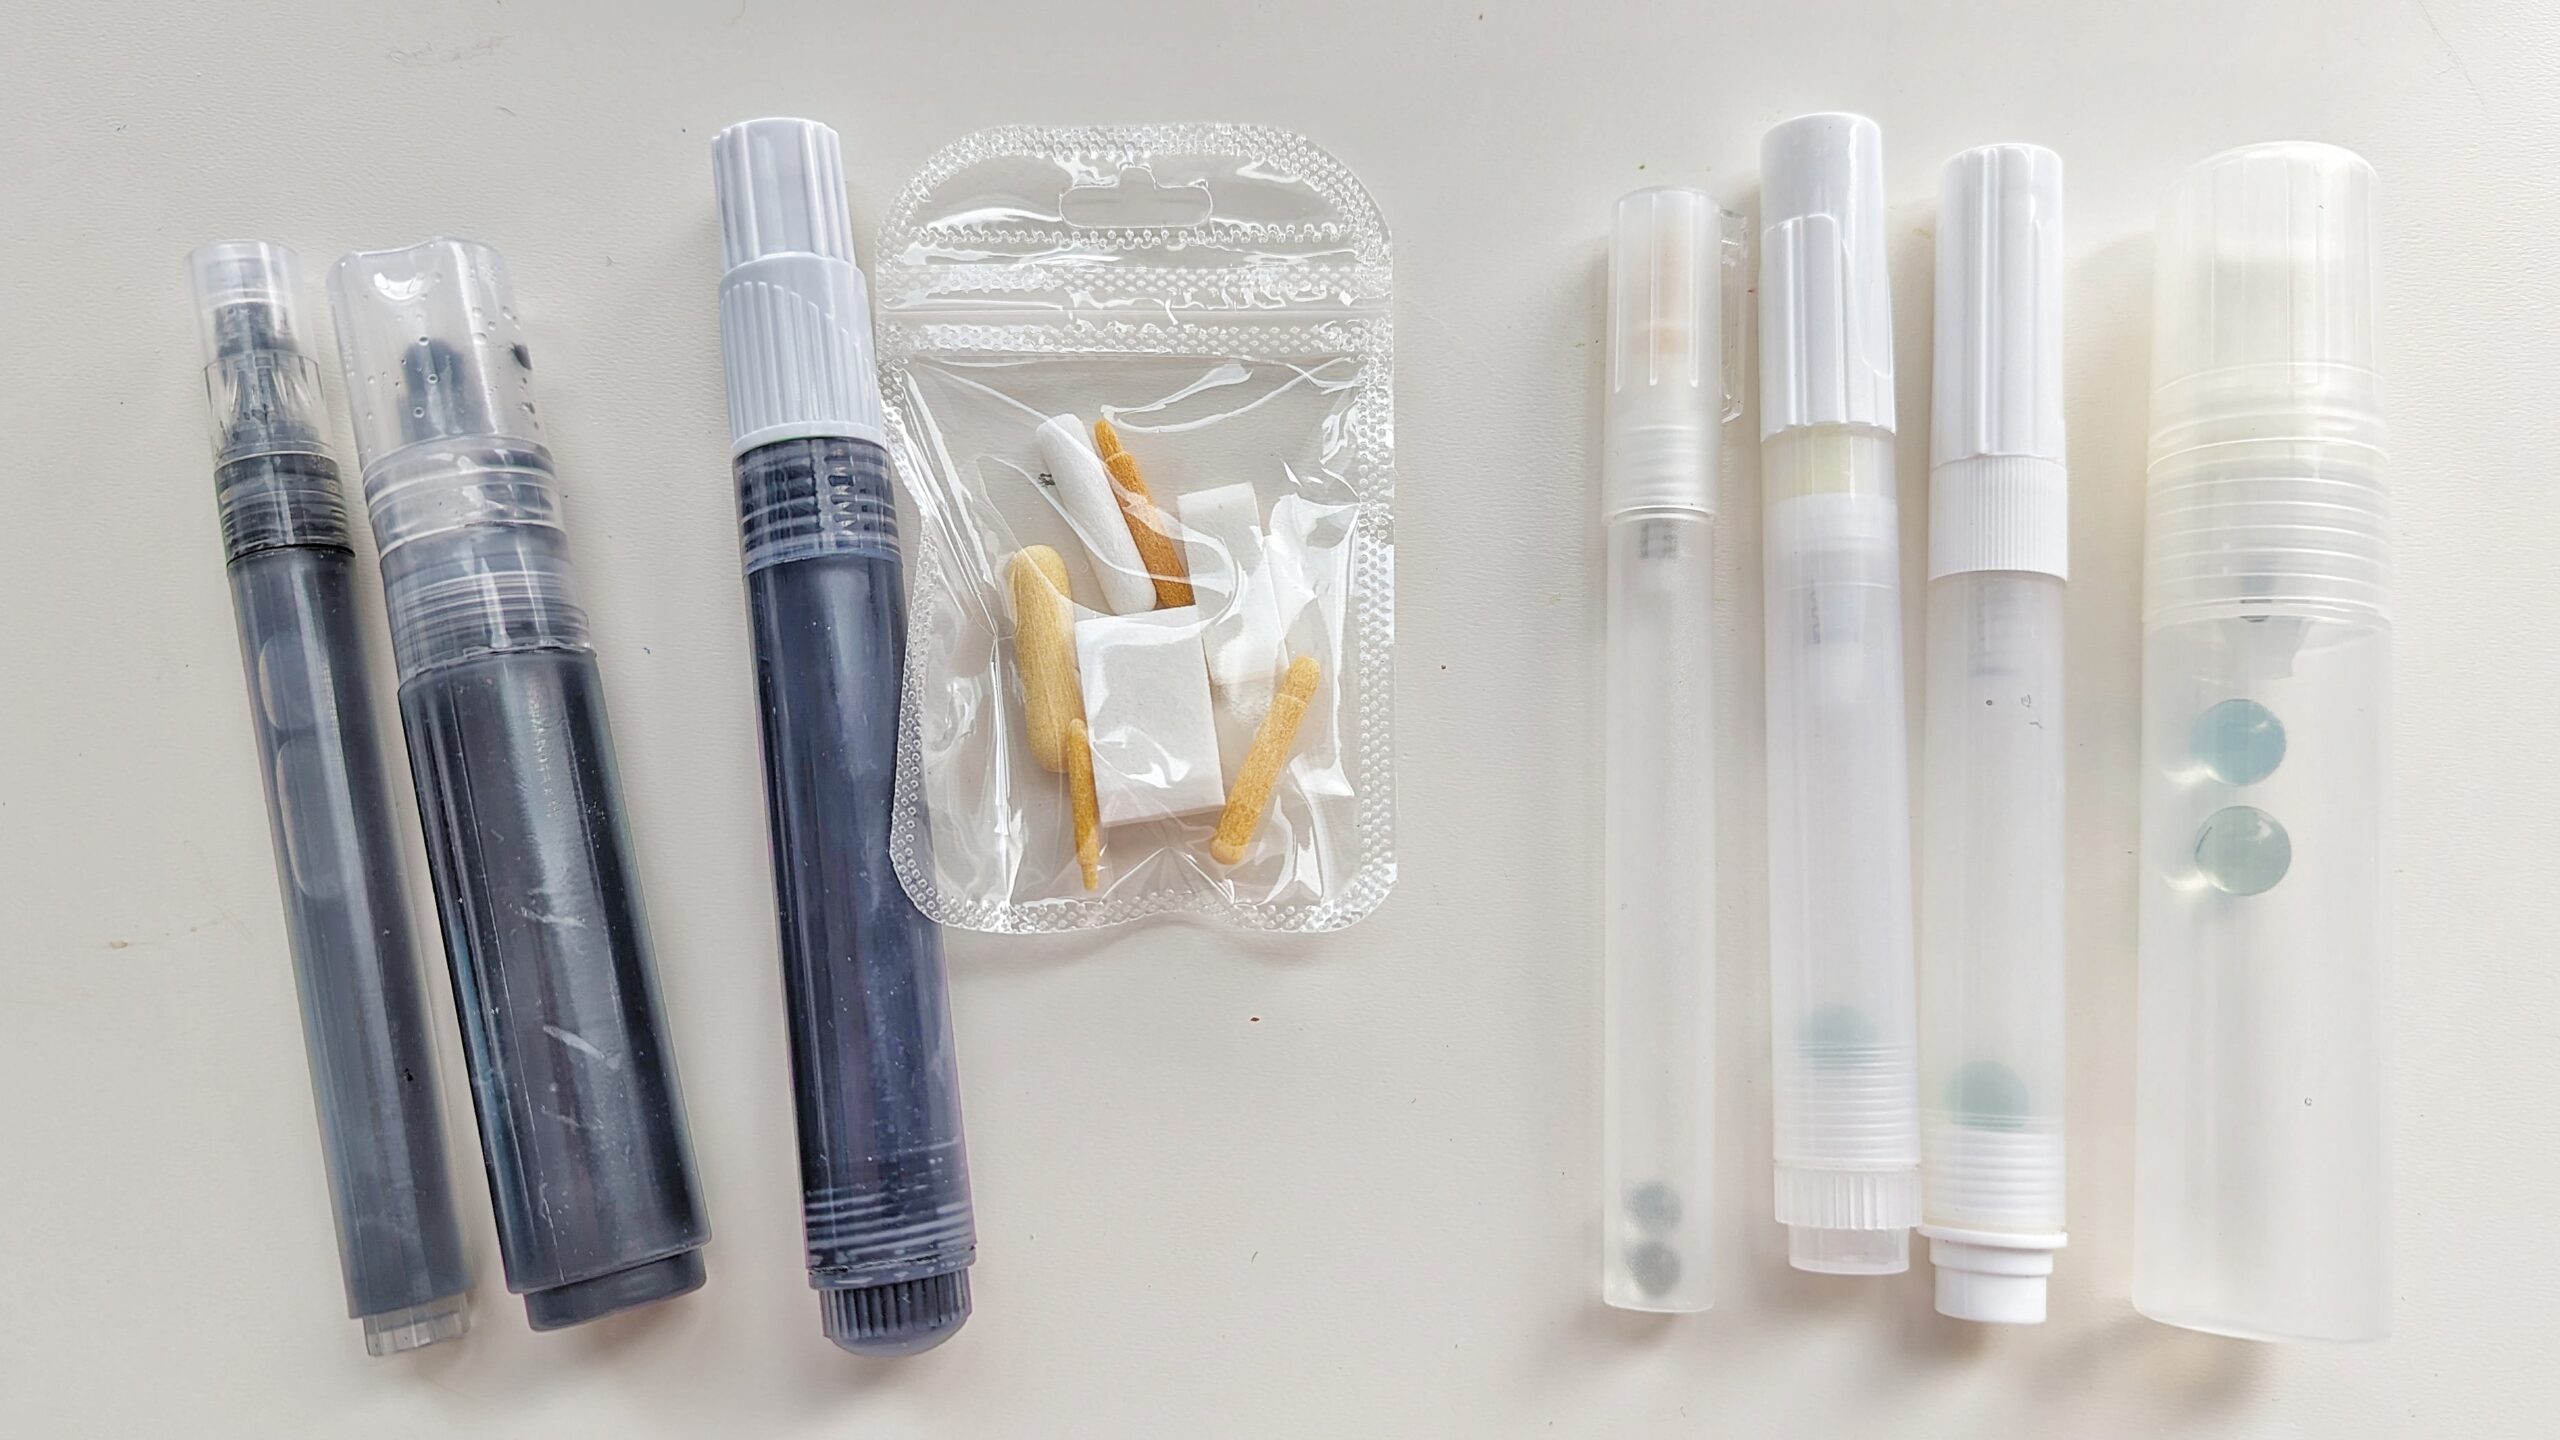
A transparent refillable marker essentially consists of several key components:
- Refillable Container: This is usually a clear tube, allowing you to see how much paint or ink is left. Inside it, there are one or two small mixing balls, which help to keep the contents well stirred and consistent in texture after you give the marker a good shake.
- Replaceable Tip: At the front, you’ll notice a polyester fiber tip, favored for its durable nature. When your tip wears down or breaks, simply swap it with a new one, making your marker last much longer.
- Tip Holder: The replaceable tip is firmly seated within a plastic holder. This holder is build with some flexibility, so you can control the flow of paint or ink by applying gentle pressure. You can also pump it up to make sure the medium is floating well.
- Cap: The cap on a refillable marker is more than just a cover. It creates a tight seal to stop ink from drying out, and often has a clip to keep it handy. Some caps even have tiny vents to prevent pressure build-up and messy leaks.
Ink/Paint Selection

When choosing the ink or paint for your refillable markers, aim for a balanced consistency that allows the pigment to flow smoothly through the marker tip.
Quick takeaway: A too-thick liquid can hinder your creative flow, while one that’s too thin may reduce control and opacity. Experiment with dilution to find the perfect balance for your artistic needs.
Here’s a simple guide I came up with that will help you with that.
Acrylic Paint

Based on my experience, I came up with two recipes when I use a craft store acrylic paint:
- More Fluid: Combine 1 part of paint with 1 part of water. This mixture offers easier blending and a similar feel to watercolor.
- Less Fluid: Use 2 parts paint and only 1 part of water for a consistency that’s closer to commercially prepared acrylic markers.
Remember: While you can use thicker acrylic paint, it’s essential to dilute it to avoid clogging the marker’s nib. If the paint is too thick, it won’t flow out properly, resulting in uneven lines.
Liquid Ink
I have not tried using ink yet but based on the common sense, you should follow this guideline:
- Ensure your chosen ink is fluid enough to saturate the tip without being so watery that it bleeds excessively on the page.
Step-by-Step Refilling Process
Refilling your markers is straightforward. A precise and careful approach ensures that your markers are refilled successfully without any mess. Follow these steps:
Preparation
- Lay down some old newspaper or a craft mat to protect your workspace.
- Wear gloves if you want to avoid staining your hands with ink.
Open The Refillable Container
Now, you need to open the refillable container. The way how to do it depends on the model:
- For some markers, unscrewing the tail cap at the end is how you’ll gain access to the refillable reservoir.
- In others, you’ll need to unscrew and remove tip holder.
Adding Ink

I use a syringe for the refill.
Note that as I mentioned earlier, depending on the thickness of the paint, you may need to dilute it with water.
Using a syringe allows me to easily mix the paint right in the syringe. I usually fill it up with the paint first and then with water. This way when I empty it, the water would flash down the paint.
Once you fill the syringe up, just pour it all in the marker container.
Finishing Up
After refilling, ensure the marker is sealed correctly to prevent drying or leaking after refilling.
Then, you need to get the paint or ink to the nib. For that, just pump the marker tip up and down until you start seeing the liquid coming through it.
Cleaning And Maintaining Your Refillable Markers
To keep your refillable markers in top condition, it’s essential to follow a routine maintenance schedule. Here’s a simple guide to help you care for your markers so they remain as functional as the day you bought them.
Securing the Cap:
Always make sure to secure the cap after each use. A tight fit keeps the ink or paint from drying and ensures your markers remain ready for your next creative session.
Marker Cleaning:
When you notice your marker’s ink depleting, take the opportunity to give it a thorough clean. Here’s how:
- Carefully take apart your marker.
- Submerge the components in warm, soapy water and leave them to soak overnight.
- The next day, gently rinse the pieces with clean water.
- Allow all the parts to air dry completely before reassembling.
- Once dry, proceed to refill your marker with the appropriate ink or paint.
Note: Some parts of the marker might be sensitive to certain cleaning solutions. Refer to your marker’s manufacturer guidelines to ensure compatibility.
Maintaining Nibs:
If you find your marker’s tip has become dirty or clogged, consider following guided methods to clean paint pens that involve similar techniques such as dipping the nibs in water or a recommended cleaning solution.
Storage:
Store your marker horizontally to allow the ink to distribute evenly.
Can You Change The Paint In The Marker After Filling It?
Changing the paint in your refillable markers to a new color can be a refreshing update, but it requires careful cleaning to avoid color contamination.
I would not recommend it but if you really want to do it, here is a guide to help you go through the process:
- Carefully take apart your marker. This usually involves removing the tip and any other components that come into direct contact with the paint.
Clean it:
- Rinse all the parts with soapy water to remove the old paint.
- Pay special attention to the marker’s tip and the valves, as these parts tend to trap residual paint.
- If available, use a soft brush to scrub away any stubborn paint residue.
Dry it:
- After washing, pat dry all the components with a clean cloth.
- Allow the parts to air dry completely to avoid any moisture mixing with the new paint.
Once dry, reassemble your marker. Make sure that all pieces are snugly fitted back together.
Keep in mind that until the last traces of the old paint are flushed out through use, the new color may show signs of the previous hue.
This process of color switching may not be instantaneous but can certainly be achieved with some patience and thorough cleaning.
Troubleshooting Common Problems

Leaking Paint
When your refillable marker starts to leak, don’t panic – there’s usually a straightforward fix. A common culprit is the consistency of the paint. If it’s too runny, mix in a thicker paint to balance it out.
Loose Cap
Take a moment to check the caps on your markers. If they’re not screwed on firmly, that could lead to leaks. A simple twist until they’re snug can solve your problem. Remember, righty-tighty!
Dislodged Tips
A marker tip that is not properly seated can also be a cause for leaking paint.
Gently remove the tip and then reseat it carefully, making sure it’s fully inserted. This should ensure that the ink flows just where you want it.
Conclusion
Refillable markers present a fantastic opportunity to balance creativity and environmental consciousness.
Adopting these markers means you contribute less waste, since you’re not frequently disposing of non-refillable markers. However, be mindful of potential paint leaks, which can be a common issue if not handled properly.
I hope my post will help you with using and maintaining such markers!